

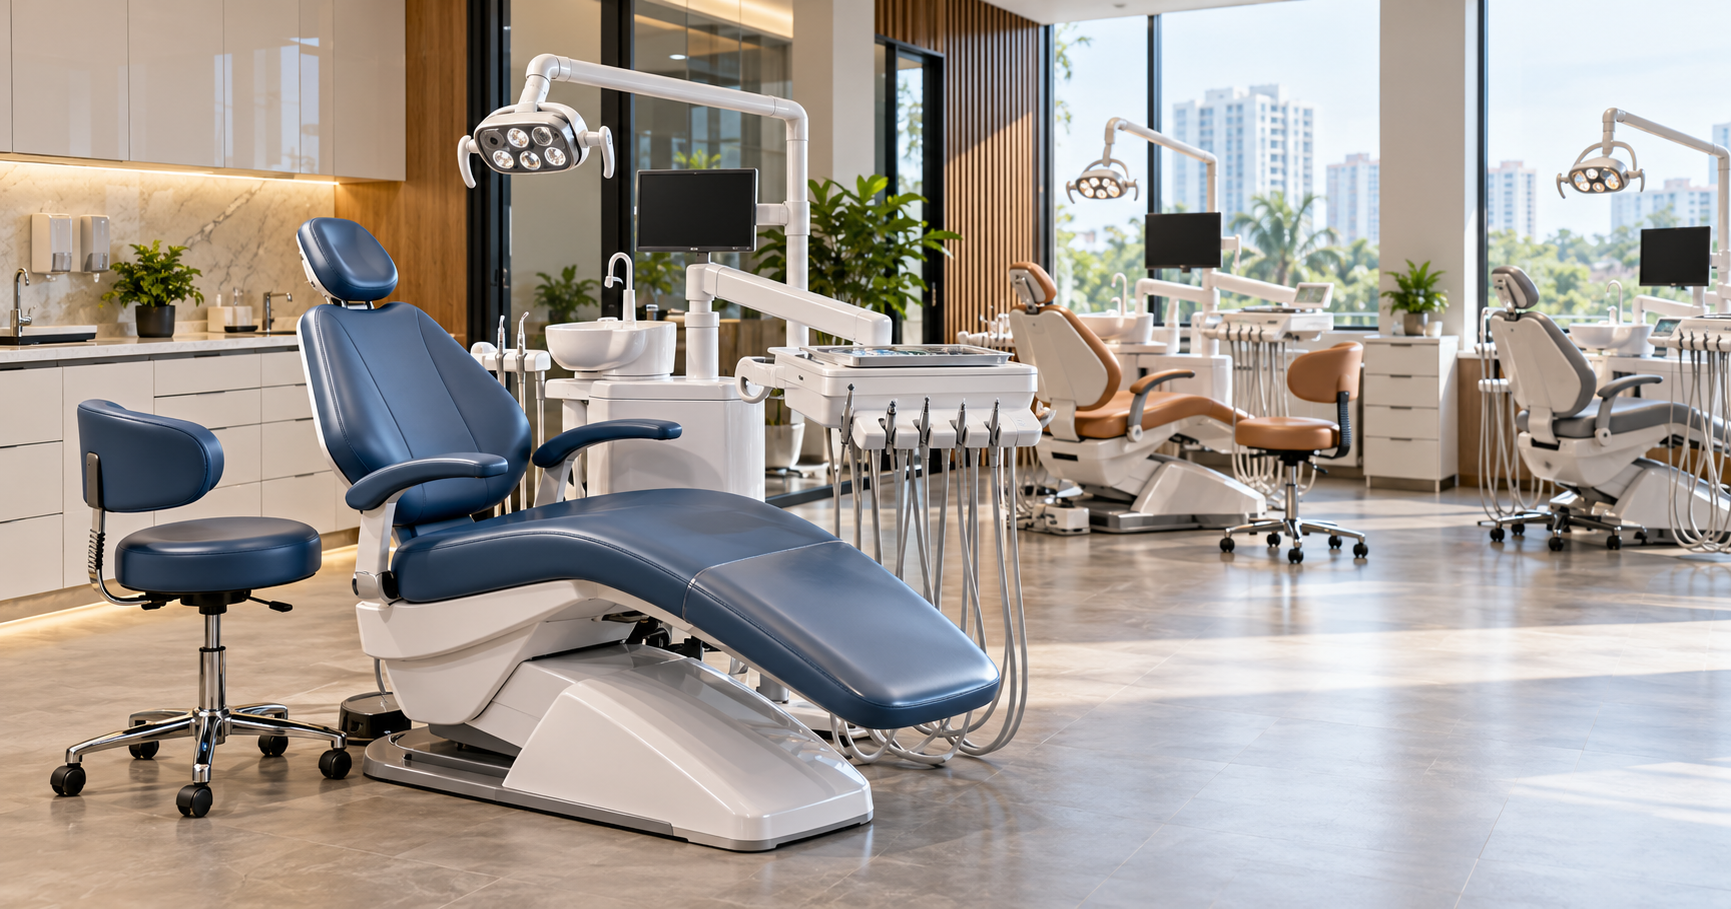

Quick answer: The right dental chair position depends on the arch you are treating. For most maxillary work, recline the patient to a supine position with the head roughly level with the knees and tilt the head back so you can see the upper arch without bending. For mandibular work, raise the backrest slightly (semi-supine) and bring the chin down. In both cases, lower the chair until the patient's mouth sits close to your elbow height, keep your back upright and your forearms close to your body, and move your stool around the head (clock positions) instead of twisting your spine.
Getting the dental chair position right is not about comfort alone. It decides whether you see the field directly, whether your assistant can reach, and how your neck and lower back feel after a 30-patient day. This guide covers patient positions, operator clock positions, a chairside checklist and what to look for in a chair if posture is a priority.
Most dental chairs, from basic hydraulic units to programmable electric chairs, allow three working positions and an entry or exit position. The names below are the ones used in most dental school ergonomics teaching.
Two practical points matter more than the label. First, the patient's head should rest fully on the headrest, with the top of the head at the upper edge. A patient who has slid down the chair forces you to lean forward. Second, the headrest angle is a separate adjustment. On chairs with a double-articulating headrest, you can tilt the head back for the upper arch and forward for the lower arch without changing the backrest.
Use the patient's occlusal plane as your guide. You want to look at the working surface as directly as possible, with mirror use where needed, rather than bending your neck to find a line of sight.
Treat the table as a starting point. Patient anatomy, mouth opening and the procedure itself will shift the exact position, and clinical judgment always comes first.
Imagine the patient's head as the center of a clock face, with 12 o'clock directly behind the head and 6 o'clock at the patient's feet. Clock positions describe where the dentist and assistant sit around that face.
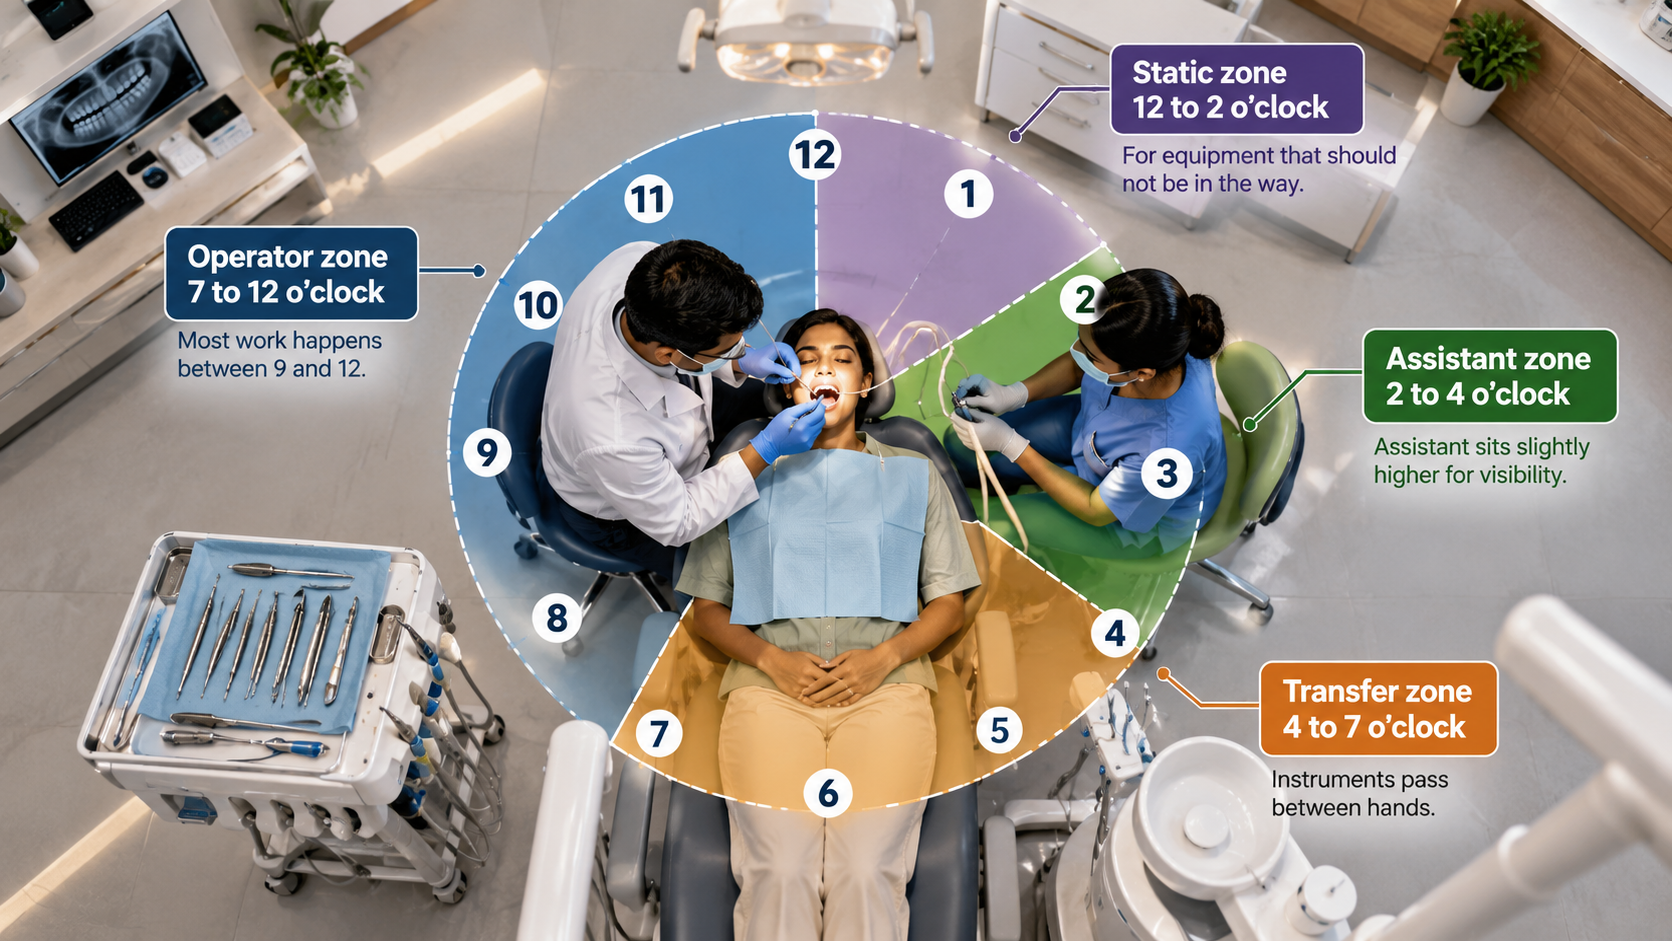
The rule that protects your back: move your stool, not your spine. If you find yourself twisting or leaning to reach a quadrant, reposition the stool and the patient's head before continuing. In four-handed dentistry, the assistant zone and transfer zone must stay clear, which also shapes how you plan the operatory. Our guide to dental chair size and operatory dimensions covers how much clear space each zone needs.
Dental chair ergonomics starts with the operator stool, then the chair. Set yourself first, then bring the patient to you.
Run through this at the start of each procedure until it becomes automatic.
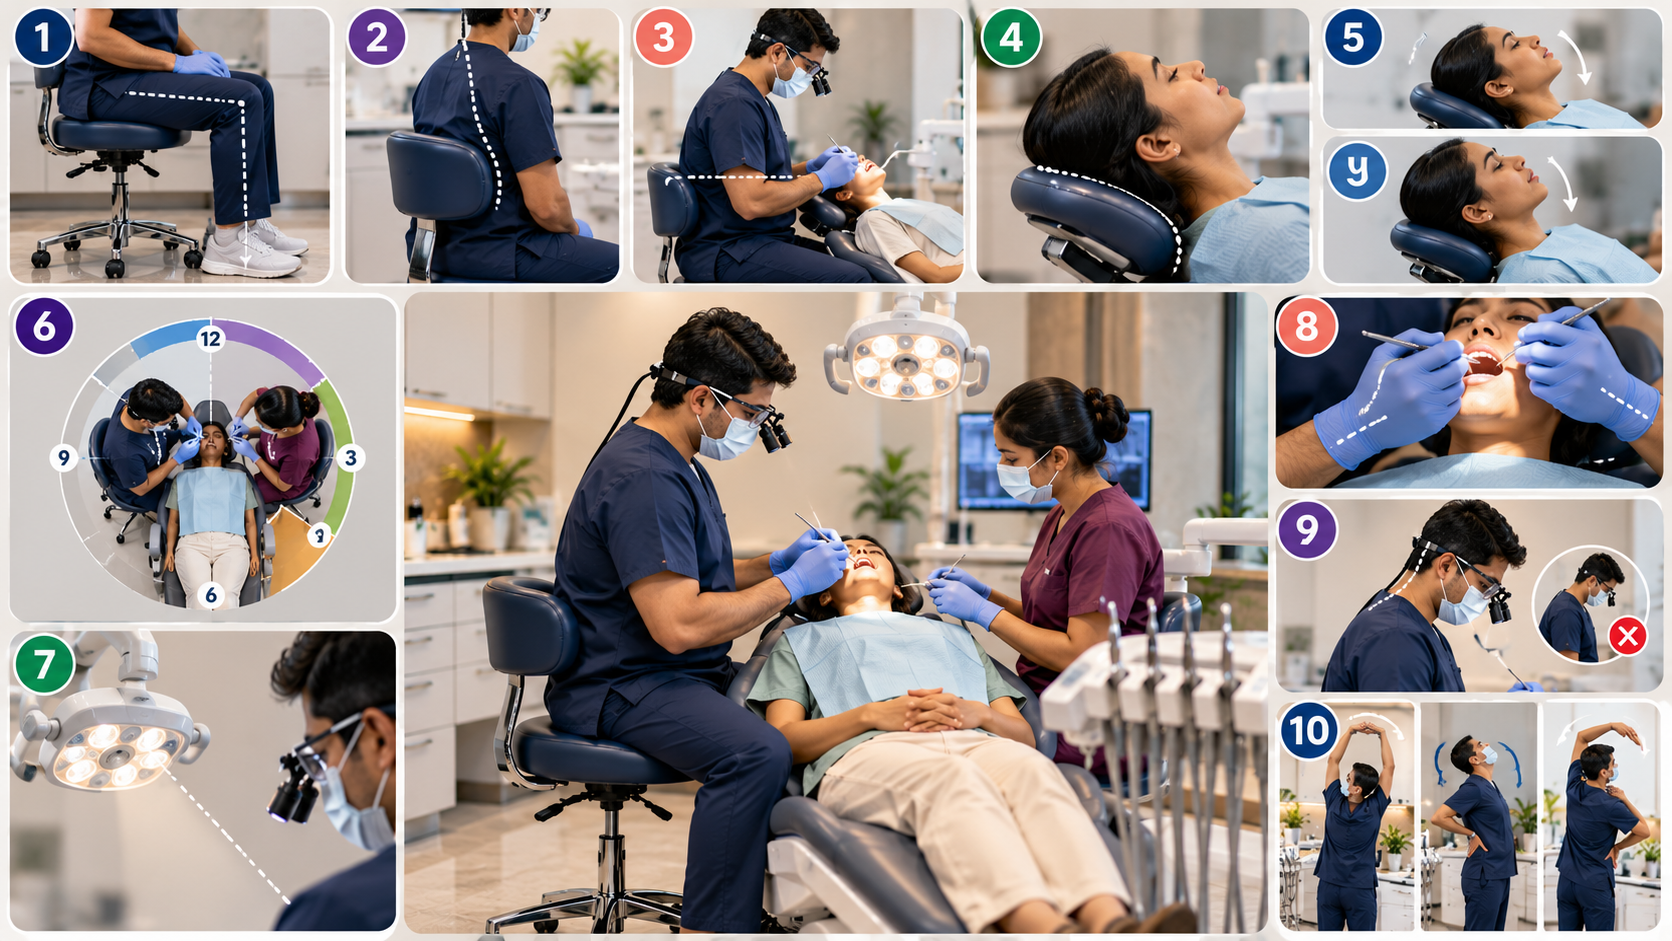
Many dentists in India start with the stool that ships with the chair package. It is worth reviewing. A stool with adjustable height, a backrest or lumbar support, and a stable five-caster base helps you hold a neutral posture for longer. Saddle stools open the hip angle and suit some operators well, though they take a few weeks to get used to. Magnification loupes with an appropriate declination angle let you see detail without leaning in. Choose the working distance to match your seated posture, not the other way around.

Dentistry combines static postures, fine motor work and repetitive movements, which is why musculoskeletal pain is a well-documented occupational problem. A 2024 systematic review in the Journal of Dental Education notes that pain from musculoskeletal disorders is experienced by all types of dental clinicians and can lead to reduced work capacity and premature retirement. The same review supports early training and testing of postural competence to reduce risk (Danylak, Walsh and Zafar, 2024, PubMed).
For a clinic owner, this is also a business issue. Pain reduces the number of productive hours you can work, and associates who are uncomfortable are less likely to stay. Good dentist chair ergonomics is one of the cheapest investments in the clinic.
If you are buying or replacing a chair, look past the upholstery color and ask how each feature affects posture. Our dental chair price guide covers costs and brands. The table below focuses only on ergonomics.
For reference, one international manufacturer lists its compact chair's lift range as 349 mm to 800 mm, a backrest thickness of 32 mm and a 60 degree swivel (A-dec 300 specifications). Use numbers like these to compare spec sheets across brands, and confirm current specs with the authorized dealer. scanO is not affiliated with any chair brand mentioned here. If you are new to chair components, our explainer on dental chair parts and functions explains what each part does.
This is a hypothetical example for illustration, not a real clinic.

A two-chair general practice in a tier-2 city has one owner dentist and one associate. The owner is tall; the associate is shorter. Both use the same chair and a basic stool supplied with the chair package. The associate often works standing for maxillary molars because she cannot get the patient low enough while seated at 12 o'clock.
The team makes four changes over a month:
Nothing here requires a new chair. Most posture gains come from positioning discipline, a better stool and a layout that keeps equipment within reach.
Every minute you spend explaining findings with the patient reclined is a minute in a working posture. Moving part of that conversation out of the chair helps. scanO air captures intraoral images and produces a visual screening report the patient can look at before or after the procedure, sitting upright and away from the operatory. You then use chair time for clinical work. It supports screening and patient communication only; examination, diagnosis and treatment planning stay with the dentist.
For most maxillary work, a supine position works best, with the patient's head roughly level with the knees and tilted back on the headrest. This lets you see the upper arch directly or with a mirror while keeping your neck upright.
Mandibular work is usually easier in a semi-supine position, with the backrest raised slightly and the patient's chin brought down. This brings the lower occlusal plane into a comfortable viewing angle.
Right-handed dentists usually work between 7 and 12 o'clock, with most procedures done from 9 to 12 o'clock. The assistant sits at around 2 to 4 o'clock. Left-handed dentists mirror these positions.
Lower the chair until the patient's mouth is close to your elbow height while you sit upright with your upper arms relaxed at your sides. If your shoulders lift or your elbows flare out, the chair is too high.
A saddle stool opens the hip angle and helps some dentists keep a natural lower back curve. It is not right for everyone and takes time to get used to, so try one for a few weeks before switching fully.
Not always. Correct patient positioning, a good operator stool, headrest use and a better tray layout fix many problems. A chair upgrade helps most when the backrest is too thick, the minimum height is too high or the headrest cannot articulate.
Setting up a new operatory? Read our guide to dental chair size and operatory dimensions to plan clear space for every clock zone, and explore how AI-assisted screening with scanO air can take first-visit photo capture out of the operatory.